An Azure virtual machine (VM) is one of several types of on-demand, scalable computing resources offered by Microsoft azure. Azure VMs provide a flexible way to create and manage virtualized computing environments without the need to purchase and maintain physical hardware. You might choose an Azure VM when you require more control over your computing environment than other options (such as platform-as-a-service or server less) can offer.
Please, let me guide on how to create your windows 11 virtual machine.
SIGN IN TO AZURE PORTAL
First and fore most you need to create azure free account before you could be able to do anything. once you create with your subscription on then you can log in here with your user name and passwords you create.
CREATE YOUR VIRTUAL MACHINE
Look for hide portal menu by the left side or search bar, type Virtual machine
From the search results, select Virtual Machine from the list shown
Then click on the Create button
Select the virtual machine highlighted

5 You will be lead to the Basics page to work with.
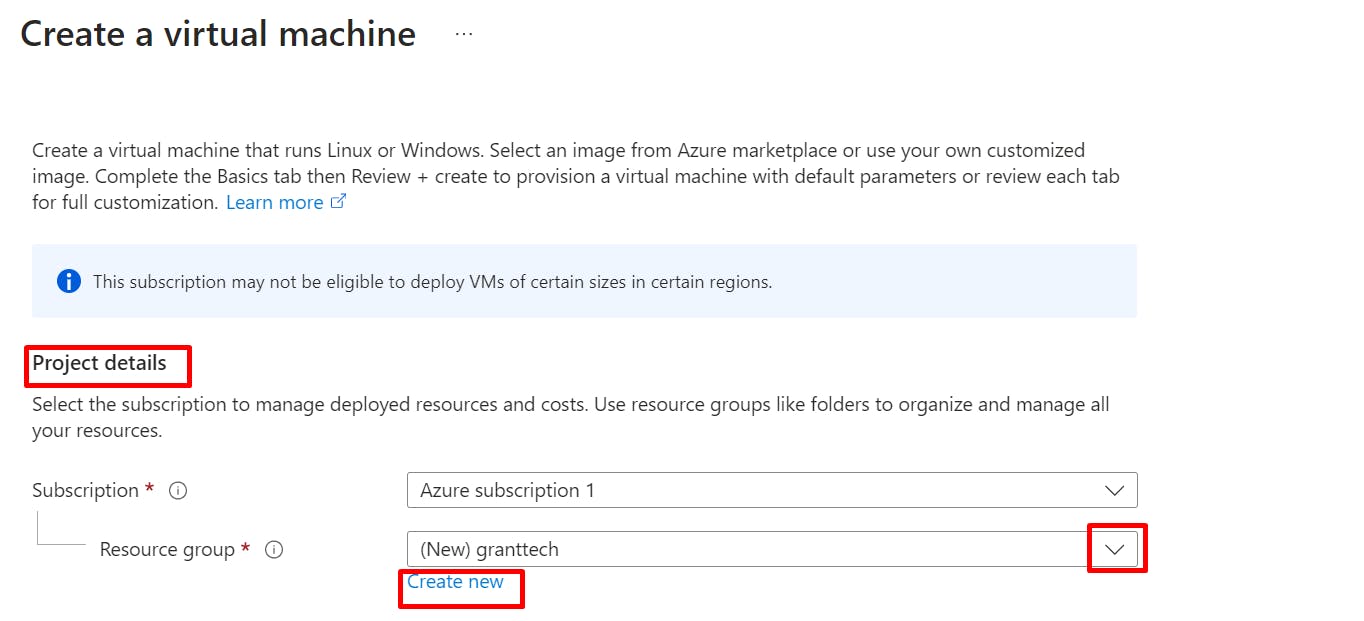
Project Details
In the project details category, we have the subscription and resource group;
1 subscription
An Azure subscription in simple terms means a membership or access pass to use Microsoft Azure.
Azure subscriptions and understand how they work:
Azure Free Account:
If you’re new to Azure, you can start with a free account. Here’s what you get:
$200 Azure credit: You receive $200 in Azure credits to explore various services.
12 months of free services: During the first 12 months, certain services are free.
Popular services: You can use popular services without any cost for 12 months
Resources Group
A Resource Group serves as a logical container where you organize and manage your Azure resources. These resources can include items like virtual machines, storage accounts, virtual networks, web apps, databases, and more in Azure cloud.
like a room with all your stuff inside arranged well, and someone later scattered.it will be hard for you to see anything that you are looking for because is not properly arranged so Resources group, group all your resources.

Instance details
1 Give your machine a name unique name you wish to
2 In the region section, select the location you want your virtual machine to be.
A region refers to a specific geographical location where cloud service providers operate their data centers. A region represents a distinct area on the globe where cloud providers have established their data centers. These data centers are strategically distributed across different regions to ensure redundancy, availability, and efficient service deliver.
3 Next, click on the drop-down to select your availability option and zone.
In azure region, a region consist of three availability zone. Zone 1, Zone 2, Zone 3. each zone has one or more data centers that a kilometers away from each other.
Azure data centers equipped with independent power, networking and cooling infrastructure to minimize the impact of failure and disruption infrastructure within these physical buildings is meticulously designed, tested, and integrated to meet stringent quality, security, and compliance requirements. Data center together is fiber optic cable, fiber optic technology allows for high speed and data transmission over long distances while maintaining low latency and high bandwidth capabilities.

4 Select your security type from drop-down

5 In the image shown, select window 11 pro from the drop-down
An image often refers to a virtual machine image. A VM image is a template used to create new virtual machines. It includes the operating system, software, and any additional configurations. When you create a new VM, you select an existing image as the starting point.

6 Select the size of your virtual machine from the drop-down or click on See all size and leave the other information in its default state.

Administrator Account
Give your account a username with your password and confirm your password ensure its the same thing.

Inbound Port Rules
On the inbound port rules section, select Allow selected ports, and then select RDP (3389). This port will give you remote access to physical work desktop computers.
click on Next disks to continue to next page

Disk
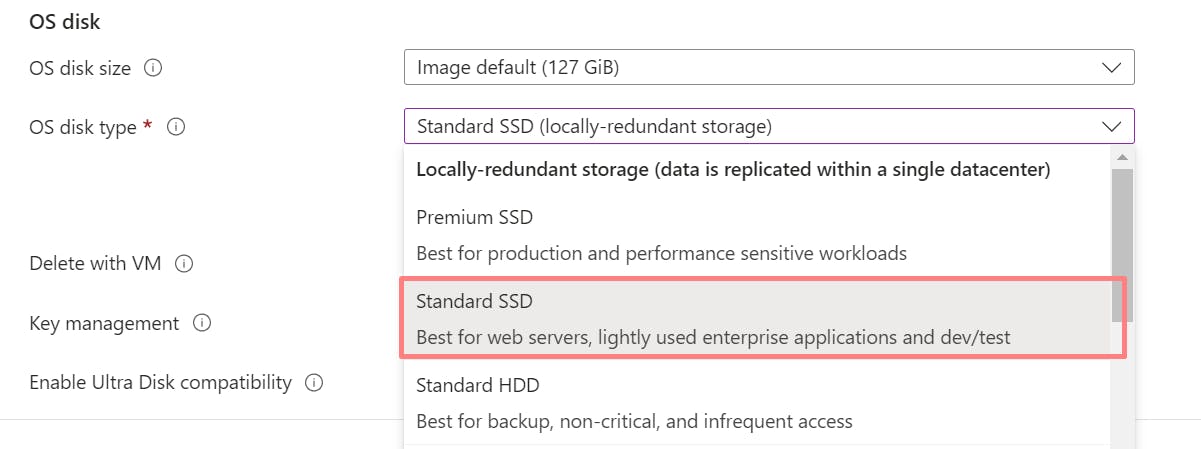
1 On the disk page click on the Os' disk type dropdown and select Standard SSD or any disk type of your choice as shown below. and leave the other columns as default.
2 leave the networking, management, monitor and advanced pages as default. skip to the Tag page.

Tag
1 Give your tag a name
Tag is a fundamental concept used to label and organize resources. Tags serve as metadata containing user-defined data. They help describe and identify resources running across an organization’s cloud environments.
2 Next, click on Review + create

3 Review the summary or the virtual machine configuration and click on the create button to begin the deployment process.


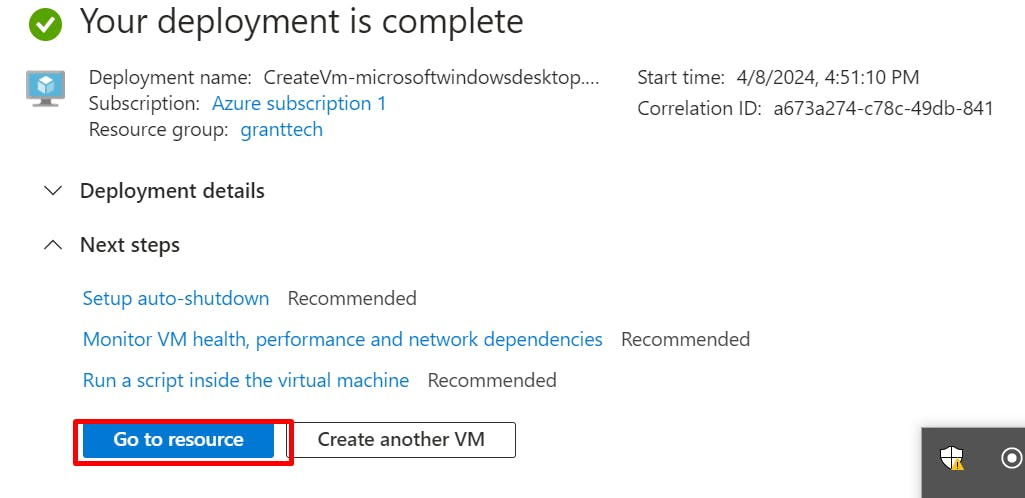
4 Once the deployment is complete , click on Go to resource

Connect to your windows virtual machine.
Create a remote desktop connection to the Virtual machine. these directions tell you how to connect to your windows 11 operating system.
1 On the overview page of your virtual machine click Connect.

2 Connect with the RDP, leave the default settings and click the download RDP file to your file

3 Open the download RDP file and click connect

4 Input your surname and the password you create

5 click yes to prompt

Welcome" You are connected to your windows 11 pro

.
